Basic instruction to assign product(s) to multiple categories.
If you are unable to follow these instructions please email customerservice@qcommerce.com.
- Log into your account
https://www.yourstore.com/x/admin - Under the tab “Catalog” select “Categories”.

- From the column “products” click on the number within the row of category you want to select items.

- If doing one product, click on the product name and go to step 6.
If doing multiple items click on the far left check box for each.
If doing the entire category click on the “Check all” link.
- Scroll to the bottom of the page and click on the “Modify selected” button.
- Main Category:
Only one category can be listed here. Choose the one that best describes the product.
Additional Categories:
You can select as many categories you feel necessary here by holding the Ctrl button while selecting the categories with the mouse.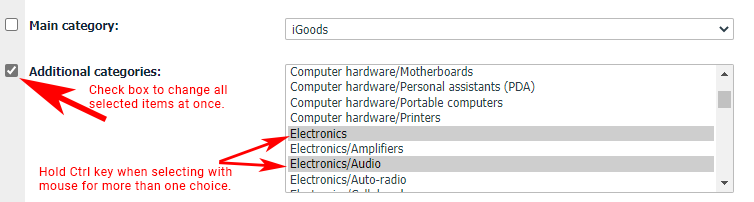
- Click the “Apply changes” button to commit the changes.
